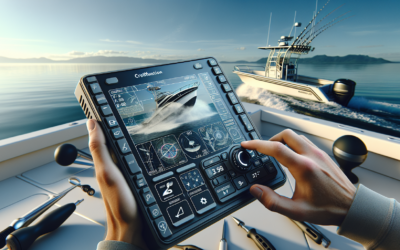
Are you an avid angler looking to up your fishing game? Look no further! We have the perfect solution for you. Our DIY Fish Finder Installation: Step-by-Step Guide for Anglers will provide you with all the necessary information and instructions to easily install a fish finder on your own. Say goodbye to the days of guessing where the fish might be and hello to a more successful fishing experience. So grab your tools and get ready to dive into the world of fish finding with our easy-to-follow guide.
Choosing the Right Fish Finder
When it comes to choosing the right fish finder, one of the first things to consider is your angling style. Different fish finders are designed to cater to various types of fishing, such as freshwater, saltwater, ice fishing, or trolling. Think about the environments you frequently fish in and the type of fish you target.
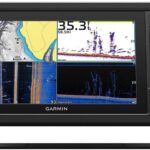
Next, you’ll need to decide on the type of fish finder you want. There are two main types: standalone fish finders and fish finder GPS combo units. Standalone fish finders excel at providing accurate sonar readings, while fish finder GPS combo units offer additional navigational features such as GPS mapping.
Lastly, check for essential features that are important to you. Some key features to look out for include the display resolution, screen size, sonar capabilities, and the ability to save and analyze data. Consider your budget and prioritize the features that are most important for your fishing needs.
Preparing for Installation
Before you start installing your fish finder, it’s essential to gather the necessary tools and materials. These may include a drill, screws, screwdriver, silicone sealant, mounting brackets, and a wiring kit. Make sure you have everything you need before you begin the installation process.
Identifying the ideal mounting location is crucial for optimal performance. Look for a spot on your boat where the transducer can be installed without obstruction and in a location that minimizes water turbulence. This typically means mounting it on the transom, hull, or trolling motor. Take into account the size and shape of your boat and the type of fishing you do when choosing the mounting location.
Planning the wiring layout is also essential to ensure a clean and organized installation. Map out where you want the cables to run and consider using conduit or wire covers to protect them. Keep in mind that cables should be routed away from engine components and other sources of interference.
Installing the Transducer
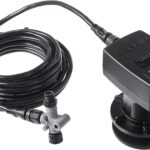
Selecting the appropriate transducer type is crucial for accurate sonar readings. There are multiple types to choose from, such as transom-mounted, thru-hull, and trolling motor transducers. Consider the type of boat you have and the type of fishing you do to determine which transducer will work best for you.
Once you’ve chosen the right transducer, it’s time to mount it to your boat. Follow the manufacturer’s instructions closely, as the mounting process may vary depending on the transducer type. Ensure that the mounting brackets are secured tightly and that the transducer is positioned correctly.
Proper alignment and angle are essential for optimal performance. The transducer should be aligned parallel to the waterline and mounted as level as possible. Avoid mounting it too close to the motor or in an area with excessive water turbulence. Take your time to adjust the angle and fine-tune the positioning to achieve the best results.
Mounting and Connecting the Display Unit
When choosing the display unit location, consider factors such as visibility, accessibility, and protection from the elements. The display should be easily viewed from your fishing position and within reach for quick adjustments. Many anglers choose to mount the display unit on the console or dashboard of their boat.
Once you’ve chosen the location, securely mount the display unit using the provided mounting brackets or a compatible mounting system. Ensure that it is installed in a sturdy and vibration-free spot to prevent any damage or interference while you’re out on the water.
Connecting the power and transducer cables is the final step in installing the display unit. Follow the manufacturer’s instructions to properly connect the cables and secure them in place. Take extra care to route the cables away from any potential sources of interference, such as engine components, and use cable clamps or wire ties to keep them neat and organized.
Routing and Managing Wiring
Routing the cables neatly and securely is important for both aesthetics and functionality. Take the time to plan the cable routes and find the most efficient path while avoiding any potential hazards like sharp edges or moving parts. Be sure to test the cable lengths before securing them to avoid any unnecessary slack or tension.
To keep the cables in place and prevent them from getting tangled, use cable clamps or wire ties to secure them along the way. These can be attached directly to the boat’s structure or mounted on cable management systems. Make sure to tighten the clamps or ties enough to prevent any movement or vibration during your fishing trips.
Sealing any holes or openings is crucial to prevent water from entering your boat. Use silicone sealant or marine-grade adhesive to seal any drilled holes or gaps around the transducer, cables, and display unit. This will not only protect your installation but also help maintain the integrity of your boat.
Testing and Calibration
Once your fish finder is installed, it’s time to power it on and perform some tests. Ensure that the display unit is receiving power and check that all the functions are working correctly. Familiarize yourself with the different settings and menus, and make any necessary adjustments before heading out on the water.
Verifying the transducer functionality is an essential step to ensure accurate readings. In a controlled environment, such as a large water tank or a bucket, lower the transducer into the water and observe the sonar returns on the display unit. This will help you confirm that the transducer is transmitting and receiving sonar signals effectively.
Calibrating the fish finder is necessary for accurate readings in different water conditions. Follow the manufacturer’s instructions to adjust the sensitivity, depth range, and other settings based on the specific fishing environment. Remember that calibration may vary depending on factors such as water temperature, depth, and bottom composition.
Fine-tuning the Fish Finder
To get the most out of your fish finder, it’s important to fine-tune its settings for optimal performance. Experiment with different settings, such as sensitivity, frequency, and color palette, to find the configuration that works best for your fishing style and the conditions you typically encounter.
Learning to interpret the display is another crucial aspect of fine-tuning your fish finder. Pay close attention to the different sonar returns, such as fish arches, baitfish schools, and underwater structures. Familiarize yourself with the icons and symbols on the display, as they can provide valuable information about water depth, temperature, and fish presence.
Don’t be afraid to experiment with different frequencies to improve your fish-finding capabilities. While lower frequencies (50 kHz) are ideal for deepwater fishing, higher frequencies (200 kHz or more) provide better resolution and target separation in shallower waters. Switching between frequencies can help you detect fish and underwater structures more effectively.
Maintenance and Troubleshooting
Regularly cleaning the transducer and display unit is essential for optimal performance. Use a soft cloth and mild soap to remove any dirt, debris, or saltwater residue from the transducer surface. Be careful not to use abrasive materials that may damage the transducer or display.
Inspecting cables and connections for any signs of damage or wear is important to prevent any potential malfunctions. Check for loose connections, frayed wires, or cuts in the cables. If you notice any issues, address them promptly to ensure your fish finder continues to operate reliably.
Common issues such as intermittent readings or display malfunctions can often be resolved through troubleshooting. Refer to the manufacturer’s manual or contact their customer support for guidance on identifying and resolving common problems. Taking the time to troubleshoot will save you frustration and potentially avoid costly repairs or replacements.
Tips and Tricks for Effective Use
To truly maximize the performance of your fish finder, it’s important to understand fish behavior and their habitat. Learn about the specific fish species you target and their preferred habitats, feeding patterns, and seasonal movements. This knowledge will help you interpret the sonar returns and locate fish more efficiently.
Utilizing GPS and mapping features can greatly enhance your fishing experience. Take advantage of your fish finder’s navigational capabilities to mark hotspots, fishing spots, and underwater structures. GPS mapping allows you to create your own fishing maps and save them for future reference, making it easier to find productive areas.
Learning to interpret sonar returns accurately is a skill that takes time and practice. Pay attention to fish arches, which indicate the presence of fish, and distinguish them from false returns caused by debris or underwater vegetation. Experiment with different settings and observe how different factors affect the sonar returns to improve your interpretation skills.
Safety Precautions
When installing your fish finder, it’s crucial to avoid drilling into vital boat components. Take care to choose mounting locations that won’t compromise the structural integrity of your boat. If you’re unsure, consult a professional or refer to your boat’s manufacturer for guidance.
Electrical connections should always be protected from water and moisture to prevent any short circuits or damage. Utilize waterproof connectors and housings to ensure a watertight seal. Secure any exposed wires or connections with zip ties or similar materials to prevent them from coming into contact with water.
Adhering to the manufacturer’s instructions is essential to maintain the warranty and ensure the safe and proper operation of your fish finder. Familiarize yourself with the user manual and follow the recommended installation, operation, and maintenance procedures. If you have any doubts or questions, contact the manufacturer or seek professional assistance.

