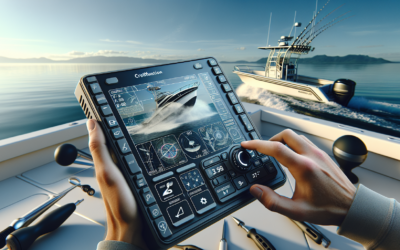
Have you ever found yourself frustrated while out on the water, trying to catch a specific species of fish but coming up empty-handed? Well, fear not, because in this article, we will explore the art of customizing fish finder settings to level up your fishing game. By understanding the specific needs and behaviors of different fish species, you can unlock the true potential of your fish finder and increase your chances of reeling in that prized catch. So grab your fishing gear and get ready to dive into the world of customized fish finder settings!
Understanding Fish Finder Settings
When it comes to fish finder settings, it’s important to have a clear understanding of what each setting does and how it can enhance your fishing experience. The following are some key settings to familiarize yourself with:
Transducer Frequency
The transducer frequency is a crucial setting that determines the range and clarity of the images produced by your fish finder. Different frequencies work better for different fishing conditions and target species. Low frequencies, such as 50 kHz, provide a wider beam and are ideal for deep water fishing, while higher frequencies, such as 200 kHz, offer better resolution and are suitable for shallower waters. Experiment with different frequencies to find the one that works best for your fishing needs.
Sensitivity
Sensitivity is another important setting that determines how well your fish finder detects the echoes from fish and underwater structures. Adjusting the sensitivity allows you to fine-tune the device’s ability to pick up weak signals. However, setting the sensitivity too high can result in false readings, while setting it too low may cause you to miss potential fish targets. Start with a moderate sensitivity setting and make adjustments as needed to find the right balance for your fishing conditions.
Fish ID
The Fish ID feature is designed to help identify fish targets and differentiate them from other underwater objects. When enabled, it assigns symbols or numbers to the fish displayed on the screen, making it easier to identify and track them. While this feature can be useful for beginners, experienced anglers may prefer to disable it and rely on their own interpretation of the fish arches and echoes displayed on the screen. Experiment with Fish ID to determine if it enhances your fishing experience.
Depth Range
The depth range setting allows you to specify the depth range that you want to focus on when using your fish finder. By adjusting this setting, you can narrow down the area of water you are interested in and get a clearer picture of what lies beneath. For example, if you’re fishing in shallow waters, you may want to limit the depth range to a few feet. On the other hand, if you’re fishing in deeper waters, you can expand the depth range to cover a larger area. Adjust the depth range according to your fishing location and target species to optimize your fishing experience.
Chart Speed
Chart speed determines how fast the fish finder updates and refreshes the sonar image on the screen. A high chart speed provides real-time data and updates rapidly, allowing you to track fish movement and changes in the underwater environment more quickly. On the other hand, a slower chart speed can provide a more detailed and accurate image of the underwater structure. Experiment with different chart speeds to find the one that suits your fishing style and preferences.
Now that you have a better understanding of the core fish finder settings, let’s delve into customizing these settings for specific fishing scenarios and target species.
Customizing Fish Finder Settings for Bass Fishing
Bass fishing requires specific adjustments to your fish finder settings to optimize your chances of success. Here’s how you can customize your fish finder settings for bass fishing:
Selecting the Right Frequency
For bass fishing, it’s generally recommended to use a higher frequency, such as 200 kHz, to get better target separation and detail in shallow waters. Bass tend to stay in shallower areas, so a higher frequency will provide a more accurate representation of their location and movements. Adjust the frequency setting on your fish finder to 200 kHz to maximize your chances of locating bass.
Adjusting Sensitivity
When bass fishing, it’s important to adjust the sensitivity setting to maximize your chances of detecting small, subtle signals. Bass have a tendency to bite lightly, so setting the sensitivity slightly higher than usual can help you detect their bites more effectively. However, be mindful not to set it too high, as it may result in false alarms. Fine-tune the sensitivity setting to strike the right balance and improve your bass fishing success rate.
Using Fish ID
The Fish ID feature can be beneficial in bass fishing, especially for beginners or those who want a quick and easy way to identify potential bass targets. However, keep in mind that Fish ID may not always accurately distinguish between bass and other fish species. It’s always a good idea to cross-reference the Fish ID readings with other indicators, such as fish arches, to confirm the presence of bass.
Optimizing Depth Range
Bass can be found at various depths depending on the time of year and environmental factors. To optimize your bass fishing experience, adjust the depth range setting on your fish finder based on the usual depth range for bass in the specific water body you’re fishing in. Pay attention to depth changes and adjust the range accordingly to ensure you’re targeting the right areas where bass are likely to be located.
Setting Chart Speed
In bass fishing, having a faster chart speed can be advantageous as it allows you to track the movements of bass more accurately and in real-time. Set the chart speed on your fish finder to a higher setting to have a better understanding of how bass are behaving and reacting to your bait or lures. A faster chart speed will enable you to adjust your fishing technique accordingly, increasing your chances of a successful bass fishing outing.
By customizing your fish finder settings specifically for bass fishing, you can significantly improve your chances of locating and catching bass.
Customizing Fish Finder Settings for Trout Fishing
When it comes to trout fishing, customizing your fish finder settings can make a significant impact on your success. Here’s how you can optimize your fish finder settings for trout fishing:
Choosing the Ideal Frequency
Trout are commonly found in shallow to moderately deep waters, so using a medium frequency, such as 83 kHz or 120 kHz, is generally recommended for trout fishing. These frequencies provide a good balance between detail and coverage, allowing you to locate trout effectively. Experiment with different frequencies within this range to find the one that works best for the specific trout fishing conditions you encounter.
Fine-tuning Sensitivity
Trout can be quite skittish and may exhibit subtle bites, so fine-tuning the sensitivity setting on your fish finder is crucial for detecting their presence. Adjust the sensitivity slightly higher than you would for other species to capture the slight movements and bites of trout. Be mindful not to set it too high, as it may result in false readings. With the right sensitivity setting, you’ll have a better chance of detecting the presence of trout and improving your catch rate.
Disabling Fish ID
While Fish ID can be useful in certain fishing scenarios, it’s often recommended to disable it when trout fishing. Fish ID can sometimes incorrectly identify trout as other species, leading to confusion and potentially causing you to miss out on valuable opportunities. Instead, focus on interpreting the fish arches and echoes displayed on your fish finder screen, as they can provide more accurate information about the presence and location of trout.
Adapting Depth Range
Trout can be found at different depths depending on the time of year, water temperature, and other factors. When trout fishing, adjust the depth range setting on your fish finder to cover the typical depth range where trout are known to frequent. Pay attention to temperature changes and underwater structure to identify the areas where trout are likely to be located. By adapting the depth range setting, you can increase your chances of locating trout and having a successful fishing experience.
Optimal Chart Speed
Trout tend to move quickly in the water, especially when they are actively feeding. Setting your fish finder’s chart speed to a higher setting can help you keep up with the fast movements of trout and make real-time adjustments to your fishing technique. A higher chart speed will provide more accurate and up-to-date information about trout behavior, allowing you to present your bait or lure more effectively. Experiment with different chart speeds to find the optimal setting for trout fishing.
By customizing your fish finder settings specifically for trout fishing, you can increase your chances of locating trout and having a productive day on the water.
Customizing Fish Finder Settings for Saltwater Fishing
Saltwater fishing requires specific adjustments to your fish finder settings due to the unique characteristics of the marine environment. Here’s how you can customize your fish finder settings for saltwater fishing:
Utilizing Different Frequency Options
When it comes to saltwater fishing, utilizing different frequency options can be beneficial as the marine environment often presents a variety of fishing conditions. For deep-sea fishing or when targeting larger species, a lower frequency, such as 50 kHz, can provide better penetration and coverage. On the other hand, for inshore or shallow water fishing, a higher frequency, such as 200 kHz, can offer better resolution and detail. Adjust the frequency setting on your fish finder based on the specific saltwater fishing conditions and target species you’re pursuing.
Calibrating Sensitivity
In saltwater fishing, it’s critical to calibrate the sensitivity setting on your fish finder to detect fish signals accurately in the presence of saltwater interference. The salt content in the water can cause disturbances and false readings, so setting the sensitivity level appropriately is essential. Fine-tune the sensitivity to strike the right balance between detecting fish targets and minimizing false alarms caused by the saltwater environment. By calibrating sensitivity, you can optimize your saltwater fishing experience and improve your chances of success.
Employing Fish ID
Fish ID can be a useful tool in saltwater fishing, especially for beginners or those who prefer a quick and simple way to identify different species. However, keep in mind that Fish ID may not always correctly identify fish in the saltwater environment due to the presence of various species and similar sonar signatures. It’s always recommended to use Fish ID as a supplementary tool and cross-reference it with other indicators, such as fish arches, to ensure accurate identification.
Managing Depth Range
Saltwater fishing can involve a wide range of depths, depending on the fishing location and target species. Adjusting the depth range setting on your fish finder allows you to focus on the specific depth range where you want to target fish. Be aware of the ideal depth range for your target species and adjust the fish finder settings accordingly. Adapting the depth range will help you locate fish more efficiently and concentrate your efforts in the most productive areas of the saltwater environment.
Controlling Chart Speed
Chart speed plays a vital role in saltwater fishing, especially when it comes to tracking the fast movements of fish in the dynamic marine environment. A faster chart speed can provide real-time updates and help you keep up with the swift movements of fish, ensuring you’re always aware of their positions. However, in certain situations where you need more detailed information about the underwater structure, slowing down the chart speed can be beneficial. Experiment with different chart speeds to find the optimal setting that suits your saltwater fishing needs.
By customizing your fish finder settings specifically for saltwater fishing, you can enhance your ability to locate and target fish in the vast and dynamic marine environment.
Customizing Fish Finder Settings for Walleye Fishing
Mastering your fish finder settings is essential for successful walleye fishing. Here’s how you can optimize your fish finder settings for walleye fishing:
Determining the Right Frequency
The ideal frequency for walleye fishing typically falls within the range of 83 kHz to 200 kHz. The specific frequency that works best may vary depending on the fishing conditions and the depth at which walleye are typically found in your fishing location. Start with a frequency of around 83 kHz and gradually adjust it until you find the frequency that provides the best combination of coverage and detail for locating walleye.
Optimizing Sensitivity
Walleye are known for their subtle bites, so optimizing the sensitivity setting on your fish finder is crucial. Increase the sensitivity of your fish finder to detect even the slightest movements or vibrations indicating a walleye bite. However, be cautious not to set the sensitivity too high as it may result in false readings from environmental noise or disturbances. Find the right balance that allows you to detect walleye bites effectively while minimizing false alarms.
Using Fish ID to Target Walleye
Fish ID can be a useful tool when targeting walleye as it can help you quickly identify potential fish targets without having to interpret fish arches or echoes. Some fish finders offer specific walleye identification options within the Fish ID feature, giving you a higher level of accuracy when targeting this species. However, it’s always a good idea to cross-reference the Fish ID readings with other indicators to ensure you’re targeting walleye accurately.
Adapting Depth Range for Efficient Fishing
Walleye can often be found at specific depths depending on the time of day and environmental factors. By adjusting the depth range setting on your fish finder, you can focus your efforts on the depth at which walleye are more likely to be found. Pay attention to temperature changes, underwater structure, and the behavior of baitfish to determine the ideal depth range for targeting walleye. Adapting the depth range will increase your chances of locating walleye and maximizing your fishing success.
Chart Speed for Walleye Fishing
The chart speed setting on your fish finder is important for tracking the movements of walleye and responding in real-time. A higher chart speed enables you to monitor changes in fish movements more quickly, ensuring you can adjust your fishing technique accordingly. However, in situations where you need a more detailed image of the underwater structure or fish arches, slowing down the chart speed can be beneficial. Experiment with different chart speeds to find the optimal setting that suits your walleye fishing style.
By customizing your fish finder settings specifically for walleye fishing, you can greatly increase your chances of locating walleye and having a successful day on the water.
Customizing Fish Finder Settings for Deep Sea Fishing
Deep-sea fishing requires specialized fish finder settings to deal with the unique challenges of fishing in the open ocean. Here’s how you can customize your fish finder settings for deep-sea fishing:
Selecting Higher Frequencies for Deep Sea Fishing
When it comes to deep-sea fishing, using higher frequencies, such as 200 kHz or even 455 kHz, can provide better target separation and detail. Higher frequencies allow for better resolution in the water column, making it easier to locate and identify deep-sea species. Adjust the frequency setting on your fish finder to higher options to maximize your chances of detecting fish in deep-sea environments.
Maximizing Sensitivity to Detect Deep-sea Species
In deep-sea fishing, the ability to detect weak echoes is crucial for locating deep-sea species. Adjusting the sensitivity setting slightly higher than usual can help you pick up the faint echoes of fish at greater depths. However, be cautious not to set the sensitivity too high, as it may generate false readings from noise or interference. Experiment with the sensitivity setting to strike the right balance and improve your ability to detect deep-sea species.
Using Fish ID Sparingly
While Fish ID can be helpful in certain fishing scenarios, it is generally recommended to use it sparingly in deep-sea fishing. Deep-sea environments often have different species with similar sonar signatures, making it challenging for Fish ID to accurately identify them. Instead, focus on interpreting fish arches and echoes displayed on your fish finder screen to identify potential deep-sea species. Relying on your own interpretation will provide more reliable information and help you target specific species more effectively.
Adjusting Depth Range for Deep Sea Fishing
Deep-sea fishing involves fishing in vast and deep waters, so adjusting the depth range setting on your fish finder is crucial for efficient fishing. By narrowing down the depth range, you can focus your efforts on the specific depth at which deep-sea species are more likely to be found. Pay attention to temperature changes, currents, and underwater structure to determine the ideal depth range for targeting deep-sea species. Customizing the depth range setting will greatly improve your chances of success in the deep sea.
Utilizing High Chart Speed
In the dynamic deep-sea environment, maintaining a high chart speed is essential for tracking the movement of deep-sea species. A high chart speed provides real-time updates and allows you to quickly adjust your fishing technique to react to changes in fish behavior. By utilizing a high chart speed, you can stay informed about the movements of deep-sea species and increase your chances of success in the challenging deep-sea fishing conditions.
By customizing your fish finder settings specifically for deep-sea fishing, you can enhance your ability to locate and target deep-sea species in the vast and dynamic ocean environment.
Customizing Fish Finder Settings for Fly Fishing
Fly fishing is a unique fishing technique that requires specific adjustments to your fish finder settings. Here’s how you can customize your fish finder settings for fly fishing:
Selecting the Most Appropriate Frequency for Fly Fishing
When it comes to fly fishing, using a higher frequency, such as 200 kHz, is generally recommended. Higher frequencies offer better detail and resolution, allowing you to locate submerged structure and potential fishing spots more effectively. Adjust the frequency setting on your fish finder to a higher option to optimize your fly fishing experience and improve your chances of success.
Fine-tuning Sensitivity for Subtle Bites
Fly fishing often involves targeting species that exhibit subtle bites, requiring an increased level of sensitivity on your fish finder. Fine-tune the sensitivity setting slightly higher than usual to detect even the faintest movements or bites. Be cautious not to set the sensitivity too high, as it may result in false alarms caused by changes in water conditions. Finding the right balance will greatly improve your ability to detect subtle bites and increase your fly fishing success rate.
Using Fish ID for Targeted Catches
Fish ID can be a valuable tool when fly fishing, as it allows you to quickly identify potential fish targets without having to interpret fish arches or echoes. Using the Fish ID feature can help you focus on the species you are targeting and increase your chances of success. However, keep in mind that Fish ID may not always provide accurate identification, especially in complex fishing environments. Use Fish ID as a supplementary tool and cross-reference it with other indicators to ensure accurate identification and targeted catches.
Adjusting Depth Range for Fly Fishing
Fly fishing often involves targeting fish in shallow waters, such as rivers or streams. Adjust the depth range setting on your fish finder to focus on the specific depth where your target species are likely to be found. By narrowing down the depth range, you can concentrate your fly fishing efforts on the most productive areas and increase your chances of success.
Controlling Chart Speed for Better Accuracy
Chart speed is an important aspect of fly fishing, as it allows you to accurately track the movements of fish in real-time. By controlling the chart speed, you can ensure that you are aware of how your target species are behaving, giving you the ability to adjust your fly fishing technique accordingly. Experiment with different chart speeds to find the optimal setting that provides the best accuracy for your fly fishing needs.
By customizing your fish finder settings specifically for fly fishing, you can enhance your ability to locate and target fish in rivers, streams, and other fly fishing environments.
Customizing Fish Finder Settings for Ice Fishing
Ice fishing requires specific adjustments to your fish finder settings to deal with the unique challenges of fishing in frozen lakes and rivers. Here’s how you can customize your fish finder settings for ice fishing:
Choosing the Right Frequency for Ice Fishing
When it comes to ice fishing, selecting the right frequency is essential for effective target separation and detail. Lower frequencies, such as 50 kHz or even 83 kHz, are often recommended for ice fishing as they offer better penetration through ice and water. Adjust the frequency setting on your fish finder to a lower option to optimize your ice fishing experience and improve your chances of successful catches.
Adjusting Sensitivity for Small Targets
Ice fishing requires the ability to detect small targets, such as panfish or trout, which exhibit subtle movements and bites. Increasing the sensitivity setting on your fish finder is crucial for detecting these small targets effectively. Fine-tune the sensitivity slightly higher than usual to enhance your ability to pick up the faint signals from these species. However, be mindful not to set the sensitivity too high, as it may result in false readings or noise from the icy environment.
Disabling Fish ID for Precision
While Fish ID can be useful in various fishing scenarios, it’s often recommended to disable it for ice fishing. Due to the colder temperatures and icy environment, Fish ID may not accurately identify the species you are targeting. Instead, focus on interpreting the fish arches and echoes displayed on your fish finder screen to locate fish beneath the ice. By disabling Fish ID, you can ensure precise targeting and increase your chances of success in ice fishing.
Modifying Depth Range for Ice Fishing
Ice fishing often involves fishing in shallow waters, directly beneath the ice. Adjust the depth range setting on your fish finder to focus on these shallow depths to optimize your ice fishing efforts. By narrowing down the depth range, you can concentrate on the specific areas where fish are commonly found during ice fishing. Customizing the depth range will greatly enhance your chances of locating fish and having a successful ice fishing experience.
Optimizing Chart Speed for Real-time Tracking
Chart speed is crucial for ice fishing as it allows you to track the movements of fish beneath the ice in real-time. A higher chart speed provides more accurate updates and helps you adjust your ice fishing technique accordingly. By optimizing the chart speed, you can respond to changes in fish behavior, increasing your chances of landing a successful catch. Experiment with different chart speeds to find the optimal setting for ice fishing in different water conditions.
By customizing your fish finder settings specifically for ice fishing, you can greatly improve your ability to locate fish beneath the ice and increase your chances of success.
Customizing Fish Finder Settings for Carp Fishing
Carp fishing requires specific adjustments to your fish finder settings to optimize your chances of success. Here’s how you can customize your fish finder settings for carp fishing:
Utilizing Frequency Suitable for Carp Fishing
Carp fishing often involves targeting fish in various water depths, from shallow areas to deeper zones. Utilizing a medium frequency, such as 83 kHz or 120 kHz, is generally recommended for carp fishing. These frequencies provide a good balance between detail and coverage, allowing you to locate carp effectively in different depths. Experiment with different frequencies within this range to find the one that works best for the carp fishing conditions you encounter.
Fine-tuning Sensitivity for Detecting Carp Movement
Carp can be quite cautious and easily spooked, requiring a higher level of sensitivity on your fish finder to detect their movements accurately. Adjust the sensitivity setting slightly higher than usual to capture the subtle movements and vibrations of carp. However, be cautious not to set the sensitivity too high, as it may lead to false alarms caused by environmental noise or disturbances. Finding the right sensitivity level will greatly improve your ability to detect carp and increase your chances of successful carp fishing.
Using Fish ID for Efficient Carp Targeting
Fish ID can be a valuable tool when carp fishing, as it provides a quick and easy way to identify potential carp targets without having to interpret fish arches or echoes. The Fish ID feature can help you quickly locate carp and increase your chances of success. However, keep in mind that Fish ID may not always provide accurate identification, especially when other fish species are present. Use Fish ID as a supplementary tool and cross-reference it with other indicators to ensure precise targeting of carp.
Setting Depth Range for Carp Fishing
Carp can be found at various depths depending on the time of day, weather conditions, and underwater structure. Adjust the depth range setting on your fish finder to cover the specific depth range where carp are most likely to be found. Pay attention to temperature changes, aquatic vegetation, and other factors that attract carp to optimize your depth range setting. Adapting the depth range will increase your chances of locating carp and having a successful carp fishing experience.
Chart Speed for Tracking Carp’s Fast Movements
Carp are known for their strong and quick movements, especially when hooked. Setting the chart speed on your fish finder to a higher setting allows you to track and respond to the rapid movements of carp in real-time. A higher chart speed provides more accurate updates about carp behavior, allowing you to adjust your carp fishing technique accordingly. Experiment with different chart speeds to find the optimal setting for tracking carp effectively.
By customizing your fish finder settings specifically for carp fishing, you can greatly enhance your ability to locate carp and increase your chances of a successful day on the water.
Customizing Fish Finder Settings for Catfish Fishing
Catfish fishing requires specific adjustments to your fish finder settings to increase your chances of success. Here’s how you can customize your fish finder settings for catfish fishing:
Selecting the Right Frequency to Locate Catfish
When it comes to catfish fishing, selecting the appropriate frequency is crucial for accurate target separation and detail. Lower frequencies, such as 50 kHz or 83 kHz, are typically beneficial for locating catfish as they provide better penetration through the water and cover a larger area. Adjust the frequency setting on your fish finder to a lower option to optimize your chances of locating catfish effectively.
Adjusting Sensitivity to Detect Catfish
Catfish have a tendency to be more lethargic and less likely to exhibit aggressive movements or bites. Adjust the sensitivity setting on your fish finder to ensure you can detect even the slightest movements or bites from catfish. Fine-tuning the sensitivity slightly higher than usual will greatly improve your ability to detect catfish and increase your chances of successful catches. Be mindful not to set the sensitivity too high, as it may result in false alarms or noise from the environment.
Using Fish ID Feature for Identifying Catfish
Fish ID can be a helpful tool when targeting catfish, as it provides a quick and easy way to identify potential catfish targets without having to interpret fish arches or echoes. Using the Fish ID feature can increase your efficiency and overall success in catfish fishing. However, keep in mind that Fish ID may not always provide accurate identification, especially when other fish species share similar sonar signatures. Use Fish ID as an additional tool and cross-reference it with other indicators to ensure precise targeting of catfish.
Optimizing Depth Range for Catfish Hunting
Catfish can be found at various depths depending on the time of day, water temperature, and other factors. Adjust the depth range setting on your fish finder to cover the specific depth range where catfish are likely to be located. Pay attention to underwater structure, temperature changes, and catfish feeding habits to optimize your depth range setting. By adapting the depth range, you can greatly enhance your chances of locating catfish and increasing your success rate.
Setting Chart Speed to Track Catfish Movement
Chart speed is crucial in catfish fishing as it allows you to accurately track the movements of catfish in real-time. A higher chart speed provides more frequent updates and enables you to adjust your fishing technique promptly. By setting the chart speed to a higher setting, you can stay informed about the movements of catfish and increase your chances of landing a successful catch. Experiment with different chart speeds to find the optimal setting for tracking catfish accurately.
By customizing your fish finder settings specifically for catfish fishing, you can greatly improve your ability to locate catfish and increase your chances of success on the water.

