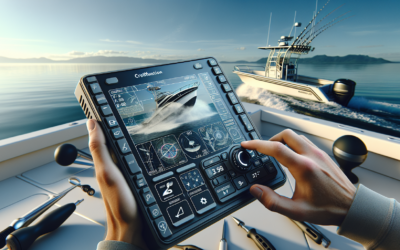
Are you an avid fisherman looking to improve your fishing skills? If so, understanding fish finder display modes is essential. With the right display mode, you can get the perfect view of what lies beneath the water’s surface, enabling you to locate and catch more fish. In this article, we will explore the different types of display modes available on fish finders and how they can enhance your fishing experience. Get ready to take your fishing game to the next level!
What is a Fish Finder?
A fish finder is a device used by anglers to locate and track fish underwater. It utilizes sonar technology to send sound waves into the water, which then bounce back when they encounter objects like fish, rocks, or vegetation. By analyzing the returning sound waves, the fish finder can create a detailed image of what lies beneath the surface, helping anglers pinpoint the location of fish and improve their chances of success.
Definition
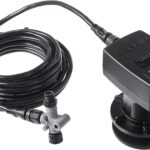
A fish finder, also known as a sounder, is a type of electronic device commonly used in fishing. It consists of a display screen and a transducer, which is the part that emits and receives the sound waves. The transducer is typically mounted either on the transom of a boat or through a hole in the ice when ice fishing. The data collected by the transducer is then translated into visual information on the display screen, allowing the angler to interpret and make use of the data.
Purpose and Importance
The main purpose of a fish finder is to help anglers locate and identify fish underwater, ultimately improving their fishing success. By providing real-time information on fish presence, depth, and location, fish finders allow anglers to spend more time fishing in productive areas and less time searching blind. This can result in a significant increase in catch rates and overall fishing enjoyment.
Fish finders are particularly important for anglers who fish in deeper waters or unfamiliar locations. In these situations, it can be challenging to accurately judge depth and locate fish without the aid of a fish finder. By providing a visual representation of the underwater environment, fish finders give anglers a better understanding of the fishing conditions and allow them to make more informed decisions on where to cast their lines.
Different Types of Display Modes
Fish finders offer various display modes that allow anglers to visualize the underwater world in different ways. These modes provide different perspectives and can be used to target specific types of fish or fishing techniques. Understanding and utilizing these display modes effectively is key to getting the perfect view underwater and optimizing fishing success.
2D Mode
2D mode is the standard display mode found in most fish finders. It uses traditional sonar technology to create a two-dimensional image of the underwater environment. The image displays the water column and any objects, fish, or structure that may be present. 2D mode provides a simple and clear representation of the underwater world, making it suitable for a wide range of fishing situations.
Down Imaging
Down Imaging, also known as DownScan Imaging, is a display mode that offers a more detailed and realistic view of the underwater environment. It uses a high-frequency beam to produce detailed images of the bottom structure, vegetation, and fish directly beneath the boat. Unlike 2D mode, which displays a flat image, Down Imaging provides a three-dimensional-like view that allows anglers to see the shape and contours of underwater features.
Side Imaging
Side Imaging is a display mode that provides a panoramic view of the underwater world on either side of the boat. It uses a high-frequency beam that sweeps across a wide area to create a detailed image of the sides of the boat’s path. Side Imaging is particularly useful for locating fish and structure that may be located away from the boat’s direct path. It offers a wider coverage area compared to traditional sonar and allows anglers to quickly identify productive fishing areas.
Understanding 2D Mode
2D mode is the simplest and most commonly used display mode in fish finders. It provides a clear and straightforward representation of the underwater world, making it suitable for various fishing situations.
How 2D Mode Works
In 2D mode, the fish finder emits a cone-shaped sonar beam into the water. The beam then spreads out in a cone shape, covering a wider area as it travels deeper. As the beam encounters objects in the water, such as fish or structure, it sends back echoes that are interpreted by the fish finder. These echoes are displayed on the screen as dots or arches, representing the presence of fish or other objects.
Interpreting the 2D Sonar Image
When using 2D mode, it is essential to understand how to interpret the sonar image correctly. Fish appear as arches on the screen, with the height of the arch indicating the strength of the return signal. Larger and more solid arches typically represent larger fish or groups of fish. It is essential to note that the size and shape of fish arches can vary depending on factors such as the depth of water, fish species, and fish behavior.
In addition to fish arches, the 2D sonar image may also display other objects, such as underwater structure, vegetation, or even debris. These objects can be distinguished from fish by their shape and location on the screen. By familiarizing yourself with the typical appearance of fish arches and other objects, you can quickly identify and target the desired fish.
Adjusting Settings for Better Clarity
To optimize the clarity and performance of the 2D sonar image, it is important to make adjustments to the fish finder settings. The most crucial setting to consider is the gain, which controls the sensitivity of the sonar. Increasing the gain can enhance the detection of weak echoes, making it easier to spot fish. However, setting the gain too high can result in clutter and false readings, so it is important to find the right balance.
Other settings to consider include the depth range, which determines the distance covered by the sonar beam, and the scroll speed, which controls how quickly the screen updates. Experimenting with these settings and understanding their effects can significantly improve the clarity and effectiveness of the 2D sonar image.
Exploring Down Imaging
Down Imaging is a display mode that provides anglers with a detailed and realistic view of the underwater world directly beneath the boat. Understanding the principles of Down Imaging and how to interpret its data is crucial for maximizing its potential.
Principles of Down Imaging
Down Imaging works by emitting a thin, high-frequency beam directly beneath the boat. This beam scans the bottom structure, vegetation, and fish in great detail, creating a clear and precise image. The Down Imaging image consists of high-resolution snapshots, allowing anglers to see the shape and contours of underwater features with impressive clarity.
Interpreting Down Imaging Data
When interpreting Down Imaging data, it is important to pay attention to the details. The image will clearly show the bottom structure, such as rocks, sand, or mud, and any vegetation present. Fish will appear as distinct shapes and shadows, allowing anglers to identify their size, shape, and behavior. By analyzing these details, anglers can make informed decisions on where to cast their lines and target specific types of fish.
As with any display mode, it is essential to familiarize yourself with the specific appearance of objects on the Down Imaging screen. By comparing the image with known underwater features and fish behavior, you can develop a good understanding of how to interpret the Down Imaging data accurately.
Choosing the Right Settings
To optimize the performance of Down Imaging, it is important to adjust the settings of the fish finder accordingly. The most crucial setting to consider is the frequency. Higher frequencies provide better detail and resolution but have a shorter range. Lower frequencies have a longer range but may sacrifice some detail. The choice of frequency depends on the fishing conditions and the desired level of detail.
Other settings to consider include the sensitivity, which controls the strength of the return signal, and the color palette, which can be adjusted to enhance the visibility of different features. Experimenting with these settings and understanding their effects can help refine the Down Imaging display and make it more effective for your specific fishing needs.
Mastering Side Imaging
Side Imaging is a powerful display mode that provides a wide-angle view of the underwater world on both sides of the boat. Understanding how to interpret the Side Imaging data and optimize its functionality is key to its mastery.
Overview of Side Imaging
Side Imaging works by emitting a thin, high-frequency beam that sweeps across a wide area on either side of the boat. The beam captures detailed information about the bottom structure, vegetation, and fish within its coverage. The Side Imaging image is displayed on the screen as a panoramic view, allowing anglers to quickly identify productive fishing areas and locate fish.
Interpreting Side Imaging Data
Interpreting Side Imaging data requires a comprehensive understanding of the image’s appearance and the behavior of fish and underwater features. Fish will be displayed as distinct shapes and shadows, allowing anglers to determine their location and size. The side structure, such as rocks, logs, or submerged vegetation, will also be clearly visible.
To effectively interpret Side Imaging data, it is essential to compare the image with known underwater features and fish behavior. By doing so, anglers can quickly identify productive areas and focus their efforts on targeting fish in those locations.
Tips for Optimizing Side Imaging
To maximize the potential of Side Imaging, it is important to optimize the settings of the fish finder. The most crucial setting to consider is the coverage area or range. Increasing the range provides a wider view and allows for more coverage and detail. However, a wider range may result in a reduced level of detail, so it is important to find the right balance for the fishing conditions.
Other settings to consider include the sensitivity, which controls the strength of the return signal, and the color palette, which can be adjusted to enhance the visibility of different features. Experimenting with these settings and understanding their effects will help you optimize Side Imaging for your fishing needs and increase your chances of success.
Using Split-Screen Modes
Split-screen display modes offer anglers the ability to view multiple display modes simultaneously, providing a more comprehensive and versatile view of the underwater world.
Advantages of Split-Screen Display
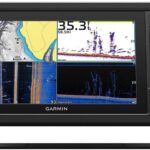
The main advantage of a split-screen display is that it allows anglers to view different display modes side by side, providing more information and a better understanding of the underwater environment. By combining different modes such as 2D and Down Imaging or 2D and Side Imaging, anglers can gain a more comprehensive view and identify fish, structure, and productive fishing areas more efficiently.
Combining 2D and Down Imaging
Combining 2D and Down Imaging modes on a split-screen display can be particularly useful for anglers who want both a broad view and a detailed view of the underwater environment. The 2D mode provides a clear and simple representation of the water column and any objects or fish present, while the Down Imaging mode offers a more detailed view of the bottom structure and fish directly beneath the boat.
Combining 2D and Side Imaging
Combining 2D and Side Imaging modes on a split-screen display provides anglers with a comprehensive view of both the water column and the sides of the boat’s path. The 2D mode allows for a broad view of the water column, while the Side Imaging mode provides a wide-angle view of the underwater world on either side of the boat. This combination is particularly useful for identifying productive fishing areas and locating fish that may be located away from the boat’s direct path.
By utilizing split-screen modes effectively, anglers can take full advantage of the different display modes and optimize their fishing success by making more informed decisions on where and how to fish.
Understanding Frequency and Cone Angles
Frequency and cone angles are key features of fish finders that directly affect the performance and capabilities of the device. Understanding how frequency and cone angles work and how to adjust them is crucial for optimizing the fish finder’s functionality.
Understanding Frequency
In fish finders, frequency refers to the number of sound waves emitted and received by the transducer per second. Fish finders typically operate at various frequencies, with higher frequencies providing better detail and resolution but having a shorter range, and lower frequencies having a longer range but potentially sacrificing some detail.
The choice of frequency depends on various factors, including the fishing conditions, depth of water, and desired level of detail. In shallow water or for targeting small fish, higher frequencies may be more suitable, while in deep water or when trying to locate larger fish or structure, lower frequencies may be more effective. It is important to experiment with different frequencies and assess their impact on the sonar image to find the optimal setting for your specific fishing needs.
Importance of Cone Angles
Cone angles refer to the coverage area of the sonar beam emitted by the transducer. A wider cone angle covers a larger area but may sacrifice some detail, while a narrower cone angle provides better detail but covers a smaller area. The choice of cone angle depends on the fishing conditions and the desired level of coverage and detail.
In general, wider cone angles are more suitable for shallow water or when searching for fish over a larger area. Narrower cone angles, on the other hand, are ideal for deeper water or when targeting fish or structure in a specific location. Adjusting the cone angle allows anglers to focus their efforts and optimize the performance of the fish finder.
Adjusting Frequency and Cone Angles
Most modern fish finders offer the flexibility to adjust the frequency and cone angles. To optimize the performance of the fish finder, it is important to experiment with different combinations of frequency and cone angles and assess their impact on the sonar image.
In general, higher frequencies and wider cone angles are ideal for shallower waters or when searching for fish over larger areas. Lower frequencies and narrower cone angles, on the other hand, are better suited for deeper waters or when targeting fish or structure in specific locations.
By understanding the effects of frequency and cone angles and making adjustments accordingly, anglers can optimize the performance and capabilities of their fish finders and increase their chances of locating and catching fish.
Enhancing Display Settings
Adjusting the display settings of the fish finder is crucial for optimizing its performance and enhancing the clarity and visibility of the sonar image. By making appropriate adjustments to settings such as gain, sensitivity, depth range, and zoom, anglers can refine the display and improve their ability to interpret the sonar data effectively.
Adjusting Gain and Sensitivity
The gain and sensitivity settings control the strength of the return signal and how the fish finder filters out background noise. Increasing the gain and sensitivity can enhance the detection of weak echoes, making it easier to spot fish or underwater structure. However, setting the gain and sensitivity too high may result in clutter or false readings.
To find the optimal setting, it is important to adjust the gain and sensitivity gradually and observe the impact on the sonar image. The goal is to find the balance where weak echoes are detected without cluttering the display. By tweaking these settings, anglers can enhance the visibility of fish and distinguish them from background noise effectively.
Controlling Depth Range
The depth range setting determines the distance covered by the sonar beam and displayed on the screen. By adjusting the depth range, anglers can focus on specific depths and reduce clutter on the display. For example, if fishing in shallower waters, setting a narrower depth range allows for better detail and target identification.
Experimenting with different depth ranges and assessing their impact on the sonar image can help anglers refine the display and focus on the most productive fishing areas.
Using Zoom Functionality
The zoom functionality of a fish finder allows anglers to magnify a specific portion of the sonar image, providing a more detailed view. The zoom feature is particularly useful for examining areas of interest, such as underwater structure, fish, or baitfish schools.
By utilizing the zoom functionality, anglers can closely analyze specific details and make more informed decisions on how to approach the fishing conditions. Zooming in on fish or structure can reveal valuable information and help anglers optimize their fishing strategies.
By effectively adjusting the display settings, anglers can enhance the clarity, visibility, and interpretation of the sonar image, leading to a more productive and enjoyable fishing experience.
Interpreting Fish Arches and Icons
Fish arches and icons are visual representations of fish displayed on the fish finder screen. Understanding how to interpret these visual cues is crucial for distinguishing fish from debris and maximizing fishing success.
Detecting Fish Arches
Fish arches are one of the most recognizable and commonly seen features on a fish finder screen. They are shaped like an elongated curve and represent the presence of fish in the water. However, it is important to note that not all fish will appear as clear arches due to various factors such as fish size, species, depth, and fish behavior.
When interpreting fish arches, it is important to consider their size, shape, and location on the screen. Larger and more solid arches often indicate larger fish or groups of fish, while smaller or broken arches may represent smaller fish or fish that are less active. The depth at which the arches appear can also provide valuable information about the fish’s behavior and preferred habitat.
Understanding Fish Icons
Many modern fish finders incorporate fish icons as an additional feature to help anglers quickly identify fish. Fish icons are simplified graphical representations of fish displayed on the screen. Each fish icon typically represents a specific size range or species of fish.
While fish icons can be helpful for quickly identifying fish, it is important not to rely solely on them for accurate fish identification. Fish icons should be used in conjunction with other visual cues, such as fish arches, to ensure accurate interpretation of the sonar data.
Distinguishing Fish from Debris
When using a fish finder, it is common to encounter other objects in the water besides fish. Debris such as logs, weeds, or rocks can sometimes appear similar to fish on the screen. To distinguish fish from debris, it is important to pay attention to the location, movement, and shape of the objects.
Fish will typically exhibit movement and change position on the screen, while debris will remain stationary. Fish also tend to have a more elongated and curved shape, while debris may appear more random or jagged. By observing these characteristics, anglers can identify fish accurately and avoid wasting time on non-productive areas.
Choosing the Right Display Mode
Choosing the right display mode for your fishing needs depends on several factors, including the fishing environment, target species, and personal preferences.
Consider the Fishing Environment
The fishing environment plays a significant role in determining the most suitable display mode for your needs. In shallow or feature-rich environments, using 2D mode may be sufficient to locate and track fish. If fishing in deeper waters or areas with complex bottom structure, Down Imaging or Side Imaging modes can provide more detailed views and increase your chances of success.
Target Species and Fishing Style
Different fish species may require specific display modes to effectively locate and target them. For example, if targeting large game fish, Side Imaging mode can be particularly helpful in locating their preferred habitat, such as drop-offs, submerged structures, or vegetation edges. If fishing for smaller species or baitfish, 2D mode may be sufficient to locate and track them.
Your fishing style and preferences also play a role in choosing the right display mode. Some anglers may prefer the simplicity and familiarity of 2D mode, while others may prefer the additional detail and realism provided by Down Imaging or Side Imaging. Experimenting with different display modes and considering your target species and fishing style will help you determine the most suitable option for your needs.
Personal Preference and Experience
Personal preference and experience also come into play when choosing the right display mode. Some anglers may have a greater level of comfort or familiarity with certain display modes, while others may prefer to try new modes and explore different perspectives of the underwater world.
Experience with a specific display mode can also influence your ability to interpret the sonar data accurately. If you have spent significant time using 2D mode, for example, you may have developed a keen understanding of how to interpret fish arches and other visual cues. Building experience and familiarity with different display modes can greatly enhance your fishing success.
In conclusion, understanding the various display modes available in fish finders and how to effectively utilize them is crucial for improving your fishing success. By learning how to interpret the sonar data, optimize the display settings, and choose the most suitable mode for your fishing needs, you can enhance your ability to locate and target fish underwater. Whether you prefer the simplicity of 2D mode, the detail of Down Imaging, or the wide-angle view of Side Imaging, the choice is yours to make based on your fishing environment, target species, personal preference, and experience level. Happy fishing!

