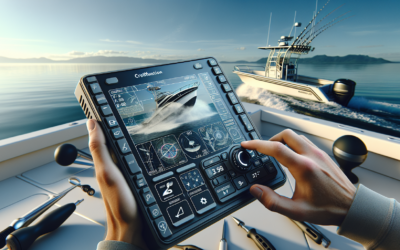
So you’ve just purchased your very first fish finder and you’re excited to get it up and running. But where do you start? In this article, we’ll guide you through the process of setting up your fish finder, from unboxing it to getting it ready for your first fishing trip. Whether you’re a beginner or a seasoned angler, this step-by-step guide will ensure that your fish finder is properly installed and calibrated, so you can start reeling in the big ones without any hassle. Let’s get started!
Choosing the Right Fish Finder
When it comes to choosing the right fish finder, there are several factors that you need to consider. One of the most important considerations is the type of fish you are targeting. Different fish have different behavioral patterns, and this will affect the type of fish finder you need. For example, if you are targeting deep-sea fish, you will need a fish finder that has a high-frequency sonar to penetrate the depths.
Another important factor to consider when choosing a fish finder is your budget. Fish finders come in a wide range of prices, so it’s important to determine how much you are willing to spend. Keep in mind that higher-priced fish finders often have more advanced features and better performance, but there are also budget-friendly options available that can still meet your needs.
The display style is another consideration to keep in mind. Fish finders come in different display styles, such as color screens or grayscale screens. Color screens provide better visibility and make it easier to distinguish between different objects and fish, but they can be more expensive. Grayscale screens, on the other hand, are more affordable and can still provide a clear image.
The type of transducer is another crucial factor to consider. A transducer is the part of the fish finder that sends and receives sonar waves. There are different types of transducers, including single frequency, dual frequency, and CHIRP. Single frequency transducers are more affordable but may have limitations in terms of depth and detail. Dual frequency transducers provide more versatility and can offer better target separation. CHIRP transducers are the most advanced and can provide the highest level of detail and accuracy.
Lastly, it’s important to research additional features that fish finders may offer. These can include GPS, mapping capabilities, weather forecasts, and networking capabilities. Depending on your needs and preferences, these additional features can greatly enhance your fishing experience.
To make a well-informed decision, it is also helpful to read reviews and seek recommendations from other anglers. Hearing from those who have already used a particular fish finder can give you valuable insights and help you choose the right one for your fishing adventures.
Gathering the Necessary Tools and Equipment
Before you can start setting up your fish finder, you will need to gather the necessary tools and equipment. Here’s a list of the key items you will need:
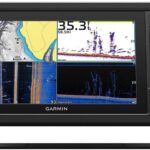
- Fish finder unit: This is the main device that includes the display and controls. Make sure to choose a fish finder that suits your needs and budget.
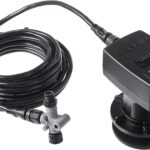
- Transducer: The transducer is responsible for transmitting and receiving sonar signals. It is usually mounted on the boat and needs to be compatible with your fish finder unit.
- Mounting hardware: Depending on the mounting option you choose, you may need brackets, clamps, or screws to secure the fish finder and transducer to your boat.
- Power source: Fish finders typically require a 12-volt power source. This can be a dedicated marine battery or your boat’s existing electrical system. Make sure to choose the appropriate power supply for your fish finder.
- Cables and connectors: You will need various cables and connectors to connect the fish finder unit to the transducer and power source. Check the specifications of your fish finder to ensure you have the correct cables and connectors.
- Optional accessories: There are several optional accessories that can enhance your fish finder setup, such as a protective cover, a sunshade, or a GPS antenna. Consider your specific needs and preferences when deciding on optional accessories.
By gathering all these tools and equipment before starting the setup process, you will be well-prepared and ensure a smooth installation.
Selecting the Ideal Location
Choosing the right location for mounting your fish finder is crucial for optimal performance. Here are a few factors to consider when selecting the ideal location on your boat:
- Consider the boat type: Different boat types require different mounting options. For example, if you have a kayak or a small boat, you may need a portable or clamp-on fish finder that can be easily installed and removed. Larger boats may have more mounting options, such as through-hull installation or transom mounting.
- Look for a convenient position: You want to choose a location that is easily accessible and within your line of sight. Make sure the fish finder is mounted in a position that allows you to view the display comfortably while navigating and fishing.
- Ensure proper depth and angle: The transducer needs to be fully submerged in the water to provide accurate readings. Make sure the mounting location allows for the proper depth and angle. Avoid mounting the transducer too close to the motor or any other structure that may create turbulence and interfere with the sonar signal.
- Avoid interference: Try to mount the fish finder away from other electronics or metallic objects that may cause interference. This can include radios, speakers, or large metal surfaces on your boat. Keeping the fish finder away from these sources of interference will ensure you get the most accurate and clear readings.
By considering these factors, you can select the ideal location for your fish finder that will provide optimal performance and convenience during your fishing trips.
Mounting the Fish Finder
Once you have chosen the ideal location for your fish finder, it’s time to mount it on your boat. Here are the steps to follow for a successful installation:
- Choose the mounting option: Depending on your boat type and personal preferences, you can choose from different mounting options such as transom mounting, through-hull installation, or portable mounting. Consider the pros and cons of each option and choose the one that best suits your needs.
- Use a mounting bracket: Most fish finders come with mounting brackets that make installation easier. Attach the mounting bracket to the chosen location using screws or clamps. Ensure that the bracket is securely fastened and stable.
- Follow the manufacturer’s instructions: Each fish finder model may have specific installation steps provided by the manufacturer. It’s important to carefully read and follow these instructions to ensure a proper and secure installation. This may include specific guidelines on how to position the brackets, how to route the cables, and how to secure the fish finder unit.
- Secure the fish finder properly: Ensure that the fish finder unit is securely attached to the mounting bracket. Double-check all screws and fasteners to make sure they are tight and secure. A loose fish finder can be a safety hazard and may result in inaccurate readings.
By following these steps, you can successfully mount your fish finder and be ready to move on to installing the transducer.
Installing the Transducer
Installing the transducer is a critical step in setting up your fish finder. Here’s how to properly install the transducer:
- Determine the transducer location: The transducer should be installed in a location that ensures it is fully submerged in the water and free from obstructions. Refer to the manufacturer’s instructions for recommended locations and guidelines.
- Clean the mounting area: Before applying any adhesive, make sure to clean the mounting area thoroughly. Use a mild detergent and a soft cloth to remove any dirt, grease, or residue. A clean mounting surface will ensure a strong and secure bond between the transducer and your boat.
- Apply a mounting adhesive: Depending on the type of transducer and mounting method, you may need to use a mounting adhesive. Follow the manufacturer’s instructions regarding the type of adhesive to use and the application process. Apply the adhesive evenly on the transducer mounting surface.
- Attach the transducer: Carefully attach the transducer to the mounting area, ensuring it is aligned properly. Apply pressure to ensure a strong bond between the transducer and the boat’s hull. Follow the specified curing time for the adhesive before proceeding to the next step.
- Connect the transducer to the unit: Once the transducer is securely mounted, connect the transducer cable to the fish finder unit. Check the manufacturer’s instructions for the correct procedure and cable connections. Ensure that the connections are tight and secure to avoid any signal loss or interference.
By following these steps, you can install the transducer correctly and ensure accurate sonar readings during your fishing trips.
Connecting the Power Source
To power your fish finder, you will need to connect it to an appropriate power source. Here’s how to do it:
- Choose the appropriate power supply: Depending on the specifications of your fish finder, you may need a dedicated marine battery or you can connect it to your boat’s existing electrical system. Make sure to choose the appropriate power supply based on the voltage and current requirements of your fish finder.
- Connect cables and connectors: Start by connecting the power cable from the fish finder unit to the power source. Follow the manufacturer’s instructions for the correct cable connections. Ensure that the connections are secure and tight to prevent any power loss or damage.
- Follow electrical safety precautions: When working with electrical connections, it’s important to follow safety precautions. Ensure that the power is turned off before connecting or disconnecting any cables. Avoid working in wet conditions and make sure your hands are dry and clean. If you are unsure about any electrical connections, consult a professional or refer to the user manual.
By correctly connecting the power source to your fish finder, you can ensure that it is fully operational and ready to use during your fishing adventures.
Setting the Fish Finder Display
Once your fish finder is powered on, it’s time to set the display settings to your preferences. Here’s how to do it:
- Power on the unit: Turn on the fish finder unit and wait for it to start up. It may take a few seconds for the display to appear and for the device to initialize.
- Adjust brightness and contrast: Use the settings on the fish finder to adjust the brightness and contrast of the display. This will ensure that you can clearly see the information on the screen, even in bright sunlight or low-light conditions.
- Select the preferred display mode: Most fish finders offer different display modes, such as split screen, full screen, or combination views. Choose the display mode that works best for you and provides the most useful information for your fishing style.
- Customize settings and options: Explore the settings menu of your fish finder to customize various options according to your preferences. This may include adjusting the sonar sensitivity, setting alarms for specific fish sizes or depths, or enabling different color schemes.
By setting up the display to your liking, you can easily interpret the information provided by the fish finder and make the most of your fishing experience.
Calibrating the Fish Finder
To ensure accurate and reliable readings from your fish finder, it’s important to calibrate it properly. Here’s how to calibrate your fish finder:
- Set the depth range: Adjust the depth range on your fish finder to match the water depth you will be fishing in. This will ensure that you are getting accurate readings for the specific depth you are interested in.
- Adjust sonar sensitivity: Fine-tune the sonar sensitivity based on the conditions you are fishing in. Higher sensitivity settings can provide more detailed information but may also result in more noise. Experiment with different sensitivity levels to find the optimal setting for your needs.
- Fine-tune fish ID and alarms: Some fish finders offer features such as fish ID or depth alarms. Customize these settings to your liking and adjust them based on your fishing preferences. This can help you easily identify fish targets and be alerted when fish are present at specific depths.
- Test and validate the calibration: Once you have adjusted the various settings, it’s a good idea to conduct some test runs to validate the calibration. Compare the readings from the fish finder with your observations and make any necessary adjustments if needed.
By calibrating your fish finder properly, you can ensure that you are getting accurate and reliable information to improve your fishing success.
Testing and Troubleshooting
Before heading out on your fishing trip, it’s important to test your fish finder and troubleshoot any potential issues. Here are a few steps to take:
- Perform a test run: Take your boat out on the water and use the fish finder in real-world conditions. Pay attention to the sonar readings, the clarity of the display, and any potential interference or connectivity issues. This will give you a good idea of how the fish finder is performing and if any adjustments are needed.
- Check for connectivity issues: Ensure that all cables and connectors are secure and properly connected. Check for any loose connections or signs of damage. Test different functions of the fish finder, such as GPS navigation or networking capabilities, to ensure they are functioning correctly.
- Troubleshoot common problems: If you encounter any issues or anomalies during the test run, consult the user manual or the manufacturer’s support resources. They can provide troubleshooting tips for common problems like poor signal quality, inaccurate readings, or display issues.
- Consult the user manual or manufacturer’s support: If you are unable to resolve any issues on your own, refer to the user manual or contact the manufacturer’s support team. They can provide guidance and assistance in troubleshooting and resolving any technical difficulties you may encounter.
By conducting thorough testing and troubleshooting, you can ensure that your fish finder is functioning correctly and ready for a successful fishing expedition.
Maintenance and Care
To prolong the life of your fish finder and ensure optimal performance, it’s important to regularly maintain and care for it. Here are some tips for maintaining your fish finder:
- Clean the fish finder regularly: Use a soft, lint-free cloth to clean the display screen, buttons, and other external surfaces of the fish finder. Avoid using harsh chemicals or abrasive materials that may damage the device. Regular cleaning will remove dirt, dust, and fingerprints that can affect the visibility of the display and the overall performance.
- Protect it from extreme weather conditions: Fish finders are designed to withstand some exposure to the elements, but it’s still important to protect them from extreme weather conditions. If possible, cover the fish finder or use a protective case when not in use. This will prevent damage from moisture, humidity, direct sunlight, or extreme temperatures.
- Store it properly during offseason: If you won’t be using your fish finder for an extended period, such as during the offseason, make sure to store it properly. Remove the fish finder from the boat and store it in a cool, dry place. Disconnect any cables and connectors and store them separately to prevent damage or tangling.
- Regularly inspect and maintain the transducer: Check the transducer regularly for any damage, such as cracks or excessive wear. Clean the transducer to remove any marine growth or debris that may affect its performance. Inspect the transducer cable for any signs of damage or wear.
By following these maintenance and care tips, you can ensure that your fish finder remains in good working condition and provides accurate readings for years to come.
In conclusion, setting up your first fish finder may seem like a daunting task, but by following this comprehensive guide, you can successfully choose the right fish finder, gather the necessary tools and equipment, select the ideal location, mount the fish finder and transducer, connect the power source, set the display, calibrate the fish finder, perform tests and troubleshooting, and maintain and care for your fish finder. With your fish finder properly set up, you’ll be ready to embark on exciting fishing adventures and increase your chances of success on the water. Happy fishing!

